Change Hyper Backup target location
When you are a heavy user of your Synology NAS like me, you might use Hyper Backup to backup your NAS data to an external site in an orderly fashion. My backups run daily for almost three years now to a OwnCloud instance I have at a Dutch hosting provider, via WebDav.
At that time I made a choice how to layout my data, but I have come up with a better plan and needed to change the destination folder of the Hyper Backup task. Unfortunately, this is not possible via the web interface of DSM. In this post I will explain how to accomplish this.
Expert users explanation
There are a few simple steps to follow:
- The configuration file is located at
/usr/syno/etc/and calledsynobackup.conf. - Use SSH to access the NAS and change the line called
remote_bucketto your desired location with vi.
(NB nano or vim is not available). - Make sure the name matches the new directory name on the target.
- Test the change with the Backup Explorer.
No option via the web interface
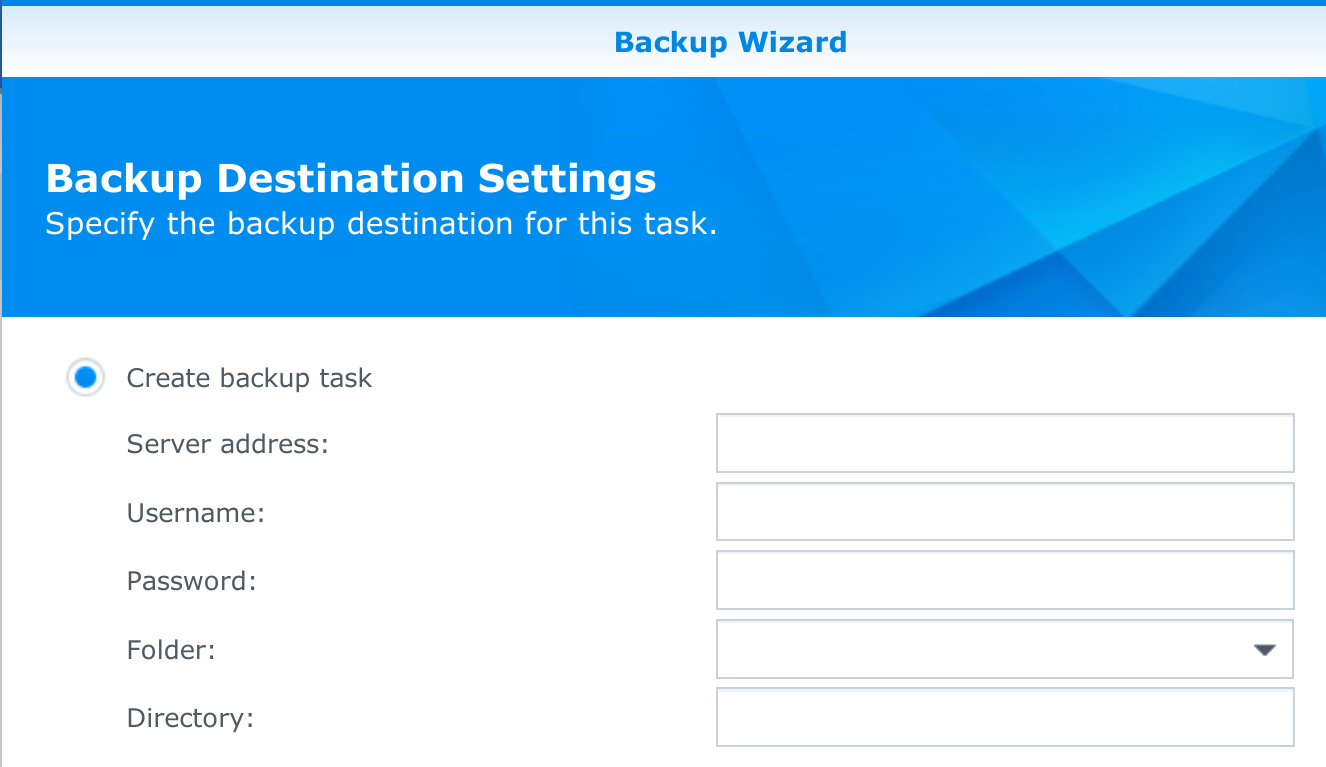
When you create a new backup for the first time, you see above settings form. If you provided the right server address and credentials, a drop down menu is available. You can select an existing folder there, or define your own directory in which the backups must be placed.

When you later check your backup settings, you notice only server address and credentials are available. No directory or folder option anymore; which might seem strange at first.
SSH to the rescue
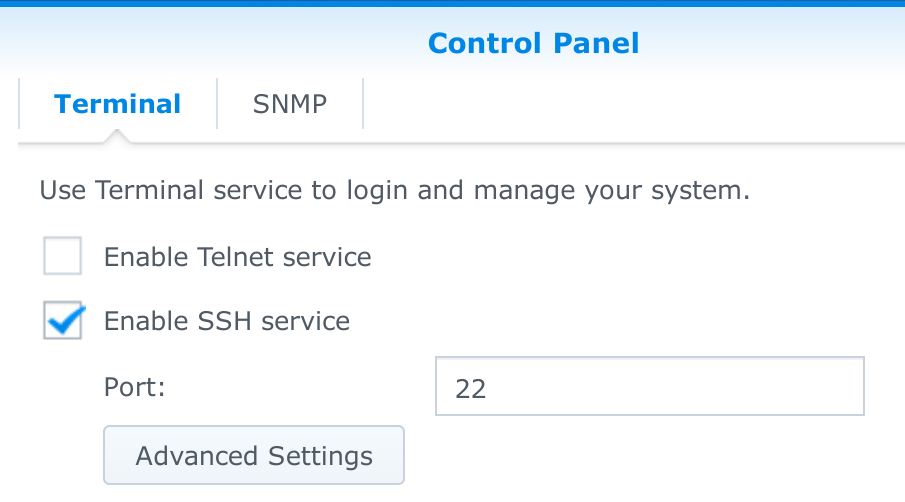
Enable the SSH service on your NAS, if you haven’t done already (mine is turned off by default). You can find this setting in your Control Panel, at the section for Terminal & SNMP. Just enable the SSH service with default settings.
Now login your NAS via SSH. Open up a terminal (command prompt under Windows) and enter the following:
ssh jurian@nas.local
Substitute jurian with your own username and nas.local with your NAS
address. Now enter your password.
Next, modify the file which contains your backup configuration. Only a basic
editorvi is an option in the terminal of Synology, so I’ll guide you through.
sudo vi /usr/syno/etc/synobackup.conf
Enter your password again and search for a line inside a [repo_1] heading (or
[repo_2], etc, if you have multiple of these repos). The line starts with
remote_bucket and move the arrow keys to place the cursor at the right line.
remote_bucket="My old directory name"
Now press the i key and change between quotes whatever the new name should be.
Next, press Esc. Now save the file via a command, press the following key
combo :wq.
You should have left the vi editor and you are back in the shell. Type exit to
quit the shell. Do not forget to turn off the ssh service again.
Change directory at target location and test
You have now changed the backup target location at your NAS, but your target hasn’t been updated yet. So go to your target via a browser (I use OwnCloud, so there is a browser interface for all my data there). Change the folder name on the target exactly how you have entered the name on the NAS.
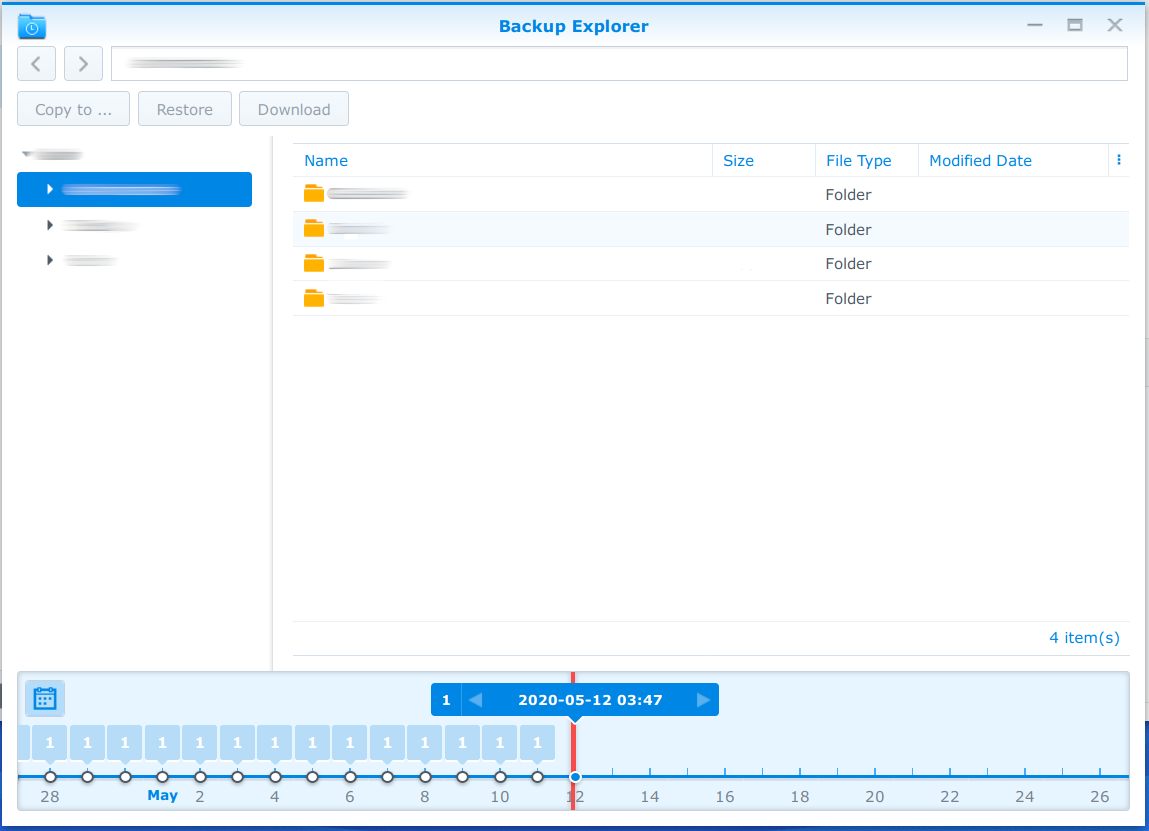
As a last step, enter DSM and go to your Hyper Backup application. There is a button called Backup Explorer, shown below:

If you enter the explorer, you must be able to browse your files, like below screenshot. If there is any error, you know the location on either your NAS or your target is not set properly and don’t match.